
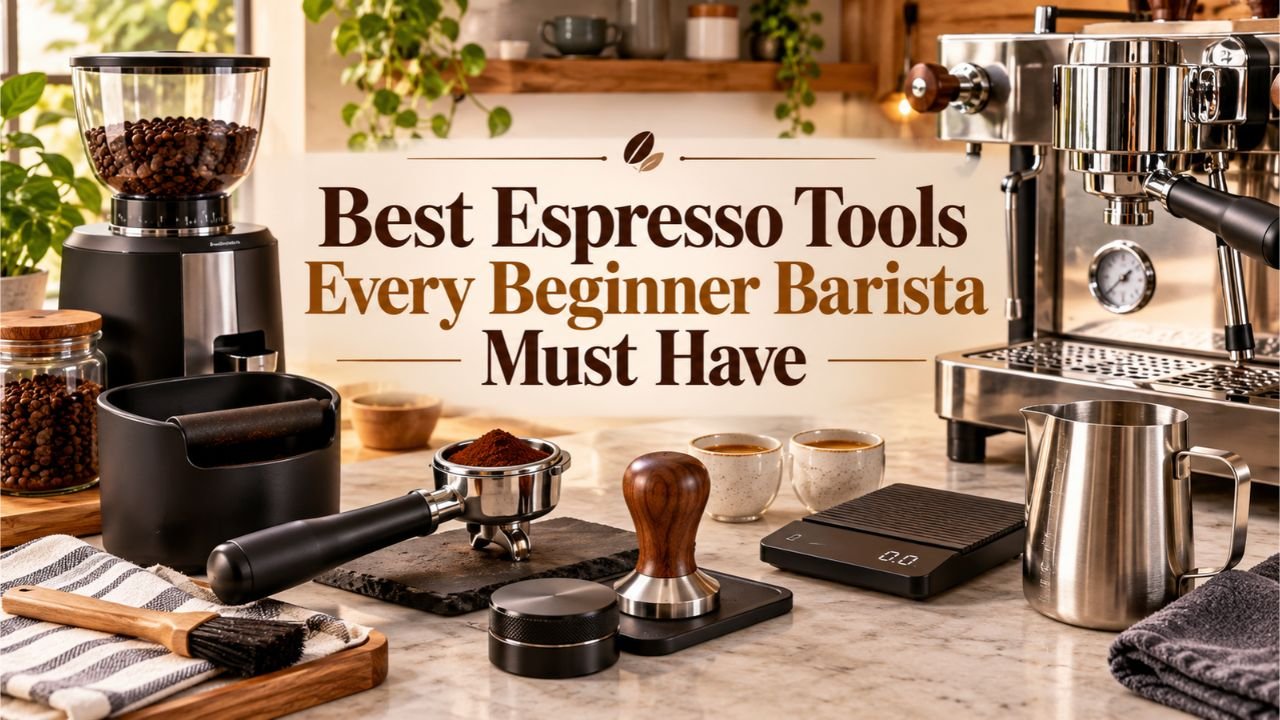
7 Top Espresso Tools Every Beginner Barista Must Have
The seven most useful espresso tools for a beginner are an espresso-capable burr grinder, a digital coffee scale, a properly fitted tamper, a dosing funnel, a WDT distribution tool, a milk frothing pitcher, and an espresso machine cleaning kit. A grinder, scale, tamper, and cleaning supplies deserve priority, while the remaining accessories serve specific preparation needs.
Making espresso at home can become frustrating when the coffee tastes sour one morning and bitter the next. The problem often comes from inconsistent grinding, inaccurate dosing, uneven coffee distribution, or poor equipment maintenance rather than the espresso machine itself.
Choosing suitable barista tools gives you more control over extraction, reduces wasted coffee, and helps create repeatable results. You also avoid spending money on accessories that look impressive but contribute little to your daily brewing routine.
According to the National Coffee Association’s September 2026 report, 47% of American adults consumed an espresso-based beverage in the previous week, the highest figure recorded in its survey. Drinks such as lattes, cappuccinos, and caffè mochas are an increasingly familiar part of U.S. coffee consumption.
The 7 best espresso tools every beginner barista must have do not all deserve equal spending priority. I recommend starting with equipment that controls grind size, coffee dose, and puck preparation before purchasing accessories for presentation or convenience.

Another detail worth checking is compatibility. A tamper designed for a 58 mm espresso basket may not fit a 54 mm basket, and some beginner machines already include a grinder, tamper, or automatic milk system.
The seven tools below cover what each accessory does, how to choose one, common mistakes, and the order in which I would purchase them. A simple brewing routine and equipment comparison will also help you decide which upgrades can wait.
Best Espresso Tools for Beginners at a Glance
A beginner does not need a countertop covered with espresso accessories.
Each tool should solve a specific problem during grinding, dosing, tamping, extracting, steaming, or cleaning.
| Espresso Tool | Main Purpose | Priority |
| 1. Espresso burr grinder | Produces finely adjustable coffee grounds | Essential if no suitable grinder is available |
| 2. Digital espresso scale | Measures coffee dose and beverage weight | High |
| 3. Espresso tamper | Compresses coffee evenly in the basket | Essential for manual tamping |
| 4. Dosing funnel | Keeps ground coffee inside the basket | Useful upgrade |
| 5. WDT distribution tool | Breaks up clumps and distributes grounds | Useful when puck preparation is inconsistent |
| 6. Milk frothing pitcher | Supports milk steaming and pouring | Necessary for manual milk drinks |
| 7. Espresso cleaning kit | Removes coffee oils, grounds, and milk residue | Essential maintenance |
This list assumes you already own or plan to buy an espresso machine with a suitable portafilter or brewing system.
Some fully automatic and capsule machines perform several preparation steps internally, reducing the need for separate accessories.
7 Best Espresso Tools Every Beginner Barista Must Have
The following seven tools cover the main stages of preparing espresso with a semi-automatic home machine.
1. Espresso Burr Grinder — Best for Controlling Extraction
An espresso-capable burr grinder is the first tool I would prioritize for a beginner using a traditional espresso machine.
A burr grinder crushes coffee beans between two grinding surfaces, producing grounds with a more controlled particle-size distribution than a typical blade grinder.
Espresso needs finely ground coffee because pressurized water must pass through a compact bed of grounds inside the filter basket.
If the grind is too coarse, water may pass through too quickly, creating weak or sour-tasting espresso.
If it is too fine, water may struggle to pass through the coffee, producing a very slow extraction that can taste harsh, bitter, or overly concentrated.
A grinder with sufficiently small adjustment steps gives you control over this process.
What to look for in an espresso grinder
Look for a grinder specifically designed or rated for espresso preparation.
Useful features include a fine adjustment range, consistent burr alignment, manageable grind retention, and a design that is straightforward to clean.
Burr grinders generally use either conical or flat burrs.
Both designs can produce suitable espresso grounds. The quality of the grinder’s adjustment mechanism and construction matters more than the burr shape alone.
For an example of a beginner-oriented design, the Baratza Encore ESP has a dedicated espresso adjustment range separate from its coarser filter-coffee range.
A manual espresso grinder is another option if you want a lower-cost setup and do not mind turning a handle for each dose.
Why I recommend buying the grinder first
A better tamper or distribution accessory cannot compensate for a grinder that cannot reach a suitable espresso grind size.
The grinder directly influences water flow, extraction time, and the taste of the finished shot.
If your espresso machine already has a capable built-in grinder, there is no immediate reason to purchase a separate one.
2. Digital Espresso Scale — Best for Measuring Every Shot
A digital espresso scale measures coffee by weight rather than relying on scoops, visual estimates, or the apparent volume of espresso in a cup.
This is one of the simplest ways to improve consistency.
Two shots made with different amounts of coffee or different beverage yields may taste different even when the grinder setting stays unchanged.
A scale removes much of that uncertainty.
What features should an espresso scale have?
Choose a compact scale with:
- Readability to 0.1 gram
- A tare function
- A built-in timer or room to use a separate timer
- A platform that fits beneath your espresso machine’s group head
- Reasonable resistance to splashes and spills
A display showing 0.1-gram increments is useful, although display resolution does not automatically guarantee laboratory-level accuracy.
The scale should respond quickly enough to let you monitor the espresso flowing into the cup.
How to use an espresso scale
A common starting recipe for a double espresso is:
| Measurement | Starting Target |
| Ground coffee dose | 18 grams |
| Finished espresso yield | 36 grams |
| Brew ratio | 1:2 |
| Approximate extraction time | 25–30 seconds |
The Specialty Coffee Association has documented approximately a 1:2 brew ratio and a 25–30-second extraction among common professional espresso practices.
These numbers are starting points, not universal requirements.
Coffee origin, roast level, machine design, basket capacity, and personal taste can change the preferred recipe.
For example, begin with 18 grams of ground coffee in a suitable basket and stop the extraction when the scale reads approximately 36 grams.
If the beverage is sour and the shot runs very quickly, try a finer grind while keeping the dose and yield consistent.
If the shot barely flows, try grinding slightly coarser.
My recommendation is to buy a scale before purchasing decorative accessories. Once you can measure the coffee dose and final yield, diagnosing inconsistent espresso becomes much more straightforward.
3. Espresso Tamper — Best for Even Coffee Puck Preparation
An espresso tamper is a tool that compresses ground coffee into a compact, level bed inside the portafilter basket.
That compressed bed is called a coffee puck.
During extraction, water passes through the puck and dissolves soluble coffee compounds.
Uneven puck preparation can encourage water to flow more readily through some areas than others.
This uneven flow is commonly called channeling.
A suitable tamper helps produce a level surface and consistent compression.
Choosing the correct tamper size
Tamper compatibility is one of the most common beginner purchasing mistakes.
Espresso machines use different basket diameters.
Examples include nominal 51 mm, 54 mm, and 58 mm portafilter systems.
Some Breville espresso machines use a 54 mm portafilter, while many commercial-style systems use 58 mm baskets.
The correct tamper-base diameter may be slightly smaller than the basket’s nominal size.
Check the machine and basket specifications before ordering.
A tamper that is too small may leave an uncompressed ring near the basket wall.
A tamper that is too large may not fit inside the basket.
Flat tampers vs spring-loaded tampers
A traditional flat-bottom tamper is sufficient for making espresso.
It requires controlled downward pressure and attention to keeping the base level.
Spring-loaded tampers may include a collar that rests on the basket rim, helping users maintain a level position.
Some also provide repeatable force through an internal spring mechanism.
These designs can be convenient, but a premium spring-loaded tamper is not a requirement for good espresso.
I would start with a comfortable, correctly fitted flat tamper if the machine does not already include one.
A better grinder and scale should receive spending priority over an expensive tamper upgrade.
4. Espresso Dosing Funnel — Best for Preventing Coffee Waste
An espresso dosing funnel, also called a dosing ring, fits around the top of the portafilter basket.
Its main purpose is to prevent ground coffee from spilling onto the countertop while filling and distributing the basket.
Espresso grounds are fine and can easily scatter when transferred from a grinder or dosing cup.
This becomes noticeable when preparing several drinks in succession.
A funnel provides an extended wall around the basket so the grounds remain contained during preparation.
What makes a good dosing funnel?
Choose a funnel that fits your basket securely.
Some models attach magnetically, while others sit on the rim through a fitted shape.
Magnetic attachment depends on the materials used in the portafilter or basket, so compatibility should be checked.
A suitable funnel should also have smooth edges, a stable fit, and enough height to contain loose grounds.
Some products permit tamping while the funnel remains attached.
Others need to be removed before tamping.
Follow the design instructions instead of forcing a tamper through a funnel that does not provide sufficient clearance.
When a dosing funnel is worth buying
I recommend one if coffee frequently spills during grinding or distribution.
It is also convenient when using a WDT tool to stir grounds inside the basket.
For a very clean grinder-to-portafilter setup, the funnel may be less necessary.
A dosing funnel does not directly control grind size or correct an unsuitable espresso recipe.
Its main advantages are a cleaner workflow, less wasted ground coffee, and easier handling before tamping.
5. WDT Distribution Tool — Best for Breaking Up Coffee Clumps
A WDT tool is a needle-style coffee distribution accessory used before tamping.
WDT stands for Weiss Distribution Technique.
The method involves moving thin needles through ground coffee to break apart clumps and distribute the grounds more evenly throughout the basket.
Some espresso grinders produce noticeable clumps because of static electricity, grind fineness, or their internal design.
Those clumps may contribute to uneven puck density.
WDT can reduce visible clumping and make puck preparation more consistent.
What to look for in a WDT tool
Choose a tool with fine, appropriately spaced needles intended for espresso preparation.
The needles should be sturdy enough to move through coffee without bending easily.
A comfortable handle and protective storage stand are useful because exposed needles can be damaged or cause minor puncture injuries.
Some tools have replaceable needles.
Expensive rotating distribution systems are not necessary for a beginner.
A simple handheld needle tool can perform the basic function.
How to use a WDT tool
After adding ground coffee to the portafilter, move the needles gently through the grounds.
Begin near the bottom of the basket and work across the coffee bed.
Avoid pushing or scraping aggressively against the metal basket.
Move through the grounds until obvious clumps have been broken apart.
Finish with a relatively level surface, then tamp normally.
The tool should distribute coffee rather than pack it down.
Is WDT necessary for every beginner?
Not always.
Some grinders already produce relatively uniform grounds, and certain espresso machines use automated dosing and tamping systems.
WDT is most useful when your grounds clump noticeably or your shots remain inconsistent despite controlling the dose and grind setting.
I would purchase this tool after the grinder, scale, and tamper rather than treating it as a substitute for those basics.
6. Stainless Steel Milk Frothing Pitcher — Best for Lattes and Cappuccinos
A milk frothing pitcher is a metal jug used to hold milk while it is heated and textured with an espresso machine’s steam wand.
It is useful for making lattes, cappuccinos, flat whites, and other espresso drinks containing steamed milk.
A suitable pitcher helps create milk with small, evenly distributed bubbles, often called microfoam.
This texture combines with espresso more smoothly than large, dry bubbles.
Stainless steel pitchers are common because they are durable, easy to wash, and suitable for steam-wand use.
Choosing a milk pitcher size
A 12-ounce (approximately 350 mL) pitcher is a practical starting point for preparing one small milk drink.
A 20-ounce (approximately 590 mL) pitcher provides additional room for larger servings or different steaming requirements.
The best size also depends on the machine’s steam-wand reach and the minimum milk level required to submerge the steam tip correctly.
A pitcher should have enough room for milk to expand while steaming.
Do not fill it to the brim.
A defined pouring spout is useful when attempting latte art, although the pitcher does not create microfoam on its own.
How to steam milk with a pitcher
Begin with cold milk and a clean pitcher.
Position the steam wand according to your machine’s instructions.
Introduce a small amount of air near the beginning of steaming, then position the wand to circulate the milk and blend the foam.
Stop heating at the appropriate temperature for the milk and the drink being prepared.
Use a thermometer if you are unsure about temperature control.
Be careful around the steam wand and pitcher, as both can become hot enough to burn skin.
Wipe the steam wand with a clean damp cloth and purge it immediately after steaming, following the manufacturer’s instructions.
Who actually needs this tool?
A milk pitcher is necessary for manual steaming when making milk-based espresso drinks.
If you drink only straight espresso or Americanos, you may not need one.
Likewise, machines with automatic milk containers or hands-free frothing systems may already provide an alternative.
I would choose a simple stainless steel pitcher before spending money on decorative latte-art accessories.
7. Espresso Machine Cleaning Kit — Best for Daily Maintenance
An espresso cleaning kit contains tools and products for removing coffee residue, oils, and milk deposits from the machine.
This is one of the least exciting purchases in a beginner espresso setup, but it deserves a place among the first accessories.
Coffee oils accumulate in filter baskets, portafilters, and areas around the group head.
Over time, old residue can develop unpleasant flavors.
Milk residue may also collect on or inside the steam wand if it is not cleaned promptly.
What should an espresso cleaning kit include?
Useful items include an espresso group-head brush, clean barista cloths, and a cleaning product approved for the machine.
A suitable descaler may also be required according to the manufacturer.
Some espresso machines support backflushing with a cleaning disc or blind filter basket.
Others require a different cleaning procedure.
Do not attempt backflushing unless the machine’s instructions permit it.
Also distinguish between espresso cleaner and descaler.
An espresso cleaning detergent targets coffee oils and residue.
A descaler targets mineral deposits caused by water hardness.
These products serve different purposes and should not be substituted for one another.
Basic cleaning routine
After brewing, remove the used coffee puck and rinse the filter basket and portafilter.
Wipe accessible residue from the machine according to its instructions.
After steaming milk, clean and purge the steam wand immediately.
Empty and wash the drip tray regularly.
Complete machine cleaning cycles and descaling procedures at the manufacturer’s recommended intervals.
Breville’s espresso maintenance guidance emphasizes steam-wand cleaning, coffee-pathway cleaning, and following model-specific instructions.
My recommendation is to purchase the cleaning products intended for your exact machine rather than buying a large universal kit with products you may never use.
Key Takeaway: Start with an espresso-capable grinder, a scale, a fitted tamper, and suitable cleaning supplies. Add a dosing funnel or WDT tool to improve puck preparation, and buy a milk pitcher if you prepare steamed-milk drinks.
How to Choose Espresso Tools Without Overspending
The smartest starter setup is not necessarily the one with the greatest number of accessories.
Buy tools that fill a genuine gap in your current setup.
If Your Espresso Machine Already Includes Accessories
Many beginner espresso machines come with a portafilter, filter baskets, and a tamper.
Some include a milk pitcher and steam-wand cleaning tool.
More advanced machines may also have an integrated grinder and automatic dosing functions.
Check the included equipment before buying anything separately.
For example, if your machine includes a suitable tamper, there is little reason to replace it before trying the original.
If the built-in grinder provides enough grind adjustment for your coffee, put the accessory budget toward a scale or cleaning supplies instead.
If You Have a Limited Budget
For a beginner with a traditional espresso machine, I would prioritize purchases in this order:
- An espresso-capable burr grinder, if one is not already available
- A compact digital scale with 0.1-gram readability
- A properly fitted tamper, if the included one is unsuitable
- Manufacturer-approved cleaning supplies
- A milk pitcher for manual steamed-milk drinks
- A dosing funnel if grounds frequently spill
- A WDT tool if clumping or uneven distribution is a problem
This is a practical purchase order, not a claim that all seven items are mandatory for every setup.
A beginner who drinks only straight espresso can skip the milk pitcher.
Someone using a grinder with a clean dosing system may not need a funnel.
A home barista with an automatic tamping machine may have little use for a separate tamper or WDT tool.
Which Accessories Deserve More Money?
The grinder generally deserves the greatest share of the tool budget.
Its burr quality, motor or hand-crank mechanism, and fine adjustment control directly affect preparation.
A scale also deserves attention, but an extremely expensive model is not necessary for a beginner.
The important features are repeatable measurements, a readable display, and a size suitable for the espresso machine.
Basic tampers, dosing funnels, and milk pitchers do not need decorative finishes or premium packaging to perform their functions.
I would spend less on appearance and more on correct sizing, reliable construction, and ease of cleaning.
Key Takeaway: Check what your machine already includes before buying new accessories. Spend more on grind control and measurement, then add inexpensive tools only when they solve a real problem.
How to Use Your Espresso Tools Together
Owning the accessories is only the beginning.
A consistent sequence matters because each preparation step influences what happens during extraction.
Step 1: Measure and Grind Fresh Coffee
Begin with freshly roasted coffee beans and a suitable espresso basket.
For a double-shot recipe, 18 grams of beans is a reasonable starting dose if the basket is designed for that amount.
Weigh the beans using the digital scale.
Grind them at an espresso setting appropriate for your machine and coffee.
Keep the dose consistent while adjusting the grinder.
Changing both the dose and grind setting repeatedly makes it difficult to identify the cause of a different shot.
Step 2: Distribute the Grounds and Tamp
Place the dosing funnel on the portafilter if needed.
Transfer the freshly ground coffee into the basket.
If the grounds contain clumps, use the WDT tool to distribute them.
Remove the funnel when required by its design.
Position the tamper level with the basket and apply firm, controlled downward pressure.
Keep the puck surface flat.
There is no need to add excessive force after the coffee is fully compressed.
Step 3: Pull and Measure the Espresso
Place the cup on the scale beneath the portafilter.
Tare the scale.
Begin extraction and monitor the beverage weight.
For an 18-gram dose, 36 grams of espresso provides a 1:2 starting ratio.
A shot taking roughly 25–30 seconds can be a useful initial reference, but timing conventions differ across machines, especially those with pre-infusion.
Taste the finished espresso before changing settings.
If it tastes thin and sour and flows very quickly, consider grinding finer.
If it tastes harsh and flows extremely slowly, try grinding coarser.
Make one adjustment at a time.
Step 4: Steam Milk and Clean the Equipment
If preparing a latte or cappuccino, transfer the appropriate amount of cold milk into the pitcher.
Steam and texture it according to your machine’s instructions.
Pour the milk into the espresso once the desired texture is reached.
Afterward, remove the used coffee puck, rinse the portafilter, and clean the steam wand.
Allow accessories to dry before storage.
A short cleaning routine after every drink reduces the buildup of residue that becomes harder to remove later.
Key Takeaway: Measure the coffee dose, control grind size, distribute the grounds, tamp level, and weigh the finished espresso. Repeat the same process before making changes based on taste and extraction time.
Espresso Accessories Beginners Can Skip at First
Espresso equipment manufacturers sell many accessories beyond the seven covered above.
Some are useful after you develop a consistent routine, but they are not necessary for the first few weeks of home espresso preparation.
Bottomless Portafilter
A bottomless portafilter has no traditional spouted bottom, making the basket’s underside visible during extraction.
It can reveal uneven flow, spraying, and signs of channeling.
This is useful for diagnosing puck preparation problems.
Yet a bottomless portafilter does not automatically produce better espresso.
It also needs to match your machine and basket system.
I would consider one after becoming comfortable with grinding, dosing, and tamping.
Coffee Puck Screen
A puck screen is a thin metal disc placed on top of the tamped coffee.
It can reduce the amount of coffee residue reaching the machine’s shower screen and may influence water distribution.
The screen also introduces another component that must be cleaned after use.
It should not be treated as a replacement for proper puck preparation.
Basket depth and headspace must be checked before adding one.
Knock Box
A knock box provides a container for disposing of used espresso pucks.
It usually has a padded bar against which the portafilter can be tapped.
This is convenient if you prepare several espressos daily.
For a beginner making one shot each morning, carefully emptying the portafilter into a suitable waste container may be sufficient.
A knock box improves cleanup rather than extraction.
Expensive Distribution and Tamping Stations
Decorative tamping stations, rotating levelers, and specialized stands can make an espresso station look organized.
Their price does not guarantee better coffee.
A simple fitted tamper, suitable grinder, and scale provide a stronger starting foundation.
Buy specialized accessories after identifying a problem that the new equipment is likely to address.
Key Takeaway: Bottomless portafilters, puck screens, knock boxes, and premium tamping stations are optional upgrades. Consistent grinding, dosing, and puck preparation deserve attention first.
Common Mistakes Beginner Baristas Make With Espresso Tools
Some beginner mistakes come from choosing the wrong equipment. Others occur when the tools are used inconsistently.
Buying an ordinary blade grinder: A blade grinder offers limited control over particle size, making espresso extraction difficult to repeat.
Ignoring basket diameter: A tamper or funnel that does not fit the basket can create an uneven puck or spill grounds.
Using scoops instead of weighing coffee: Different beans and grind sizes occupy different volumes. A scale provides more repeatable dosing.
Changing several variables together: Adjusting grind size, coffee dose, and yield simultaneously makes it harder to diagnose a bad shot.
Treating WDT as a replacement for a suitable grinder: Needle distribution may reduce clumps, but it cannot correct grounds that are too coarse or too fine.
Tamping at an angle: Uneven compression can contribute to uneven flow through the coffee puck.
Buying milk tools for straight espresso: A pitcher offers little value if you never steam milk.
Ignoring machine cleaning: Old coffee oils and milk residue can affect flavor, hygiene, and equipment operation.
Another mistake is assuming that a longer list of accessories automatically produces better coffee.
Good espresso starts with suitable beans, a capable machine, careful measurement, and repeatable preparation.
Conclusion
The 7 best espresso tools every beginner barista must have cover grinding, measuring, tamping, distribution, milk preparation, and cleaning. A suitable burr grinder and digital scale offer the strongest foundation for controlling extraction, while a properly fitted tamper supports consistent puck preparation.
A dosing funnel and WDT tool can improve the preparation routine, but neither is mandatory for every machine. A milk pitcher matters when making lattes and cappuccinos, and cleaning supplies should be available from the beginning.
My recommendation is to build your espresso setup gradually. Start with the tools your machine lacks, practice measuring and adjusting shots, and purchase additional accessories only when they solve a specific problem. A small collection of suitable tools is enough to prepare consistently enjoyable espresso at home.
FAQs About the Best Espresso Tools for Beginners
What tools does a beginner need to make espresso at home?
A beginner using a semi-automatic espresso machine needs an espresso-capable grinder, a suitable portafilter and basket, a tamper, and a way to collect the finished espresso.
A digital scale is strongly recommended for controlling coffee dose and beverage yield.
Cleaning supplies are also needed for routine maintenance.
Dosing funnels, WDT tools, and milk pitchers may improve the process or support additional drink styles, but they are not mandatory for every setup.
Is a coffee grinder more important than a tamper?
An espresso-capable grinder generally has a greater influence on extraction control than an upgraded tamper.
Grind size affects the resistance that pressurized water encounters while passing through the coffee.
A poorly adjusted grinder can produce shots that flow too quickly or too slowly.
A properly fitted basic tamper can compress coffee well without costing much.
I would prioritize a suitable grinder before purchasing a premium tamper.
Do beginner baristas really need an espresso scale?
A scale is not an absolute requirement for producing a drink, but it is one of the most useful tools for repeatable espresso.
It measures the dry coffee dose and the beverage weight.
For example, 18 grams of ground coffee producing 36 grams of espresso gives a 1:2 brew ratio.
Repeating that measurement makes it easier to evaluate changes caused by grind size, roast level, or coffee freshness.
What size tamper should I buy for my espresso machine?
The correct tamper size depends on the internal dimensions of your filter basket.
Common espresso systems use nominal basket sizes such as 51 mm, 54 mm, and 58 mm.
The tamper base may need to be slightly smaller than the nominal basket diameter to fit properly.
Check the specifications for your exact machine and basket before purchasing.
A poorly fitted tamper may leave unevenly compressed coffee near the basket edges.
Is a WDT tool necessary for good espresso?
No. A WDT tool is an optional preparation accessory that can be useful when ground coffee forms clumps or distributes unevenly inside the basket.
Its thin needles separate clumps before tamping.
Some grinders produce grounds that require little additional distribution, while certain machines automate preparation.
Start with correct grind size, dose, and tamping technique.
Add WDT if those basics are under control and clumping remains noticeable.
Do I need a milk frothing pitcher if I only drink espresso?
No. A milk frothing pitcher is mainly used for steaming and pouring milk for lattes, cappuccinos, flat whites, and similar beverages.
Straight espresso does not require steamed milk.
An Americano also does not require a frothing pitcher because it is prepared by combining espresso with water.
If you never prepare milk-based drinks, spend your budget on a grinder, scale, maintenance supplies, or coffee beans instead.
What is the best first espresso accessory to buy on a budget?
If your espresso machine already has a suitable grinder and tamper, a digital scale is often the most useful first accessory.
Choose a compact model displaying 0.1-gram increments and offering a tare function.
It should fit beneath the group head with your espresso cup.
If you do not have an espresso-capable grinder, obtaining one generally deserves priority over optional accessories.
A suitable basic setup is more useful than several decorative tools.
How often should beginners clean espresso tools?
Rinse the portafilter and basket after brewing, and clean the steam wand immediately after every milk-steaming session.
Wipe spills and remove coffee grounds from the preparation area as part of the daily routine.
Wash milk pitchers and other food-contact accessories after use.
The espresso machine’s deeper cleaning cycles, backflushing procedures, and descaling intervals depend on its design and manufacturer instructions.
Use only compatible cleaning products, and never assume that every espresso machine supports backflushing.