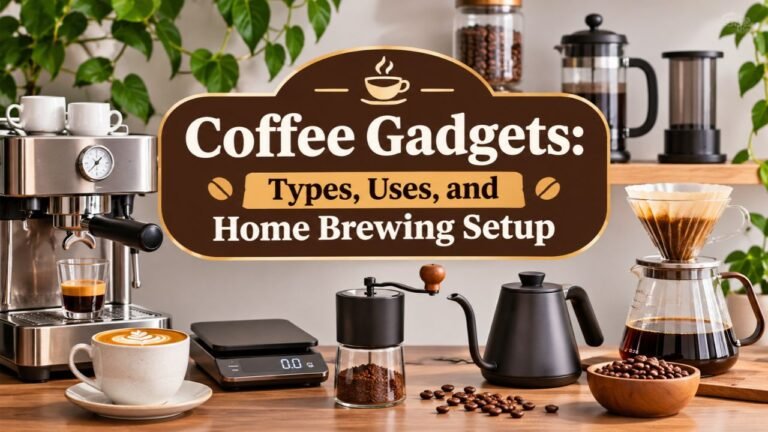

Home Barista Hub: Equipment, Brewing Skills, and Recipes
Making café-quality coffee at home starts with fresh beans, a suitable brewer, a consistent grinder, clean water, and a simple brewing recipe. You do not need expensive commercial equipment to prepare delicious coffee. Start by mastering one brewing method, measure your ingredients, and adjust the process according to taste. Espresso and milk-based drinks require additional equipment and practice.
Building a home coffee station can quickly become confusing. Espresso machines, burr grinders, scales, tampers, pour-over kettles, and milk frothers all promise better coffee, but buying the wrong combination can lead to inconsistent drinks, unnecessary spending, and a cluttered countertop.
A well-planned setup solves these problems by focusing on the tools that directly affect your preferred coffee. With repeatable measurements and a few basic brewing skills, you can prepare flavorful coffee, reduce wasted beans, and spend less time troubleshooting each cup.
According to the National Coffee Association’s September 2026 National Coffee Data Trends report, 66% of American adults drank coffee during the previous day, and 83% of those past-day coffee drinkers had coffee at home. The same report found that 48% of American adults consumed specialty coffee during the previous day, showing the growing interest in drinks beyond ordinary brewed coffee.
The Home Barista Hub brings together the main skills and equipment needed to prepare coffee at home, from selecting your first brewing device to adjusting espresso extraction and steaming milk for cappuccinos.

What stood out to me during the research was how often improvements come from correcting basic variables rather than purchasing another accessory. A consistent grind, measured coffee dose, suitable water, and careful cleaning can make a noticeable difference even with modest equipment.
The sections below cover home coffee station planning, essential equipment, coffee beans, brewing methods, espresso recipes, milk steaming, latte art, troubleshooting, maintenance, and the next skills worth practicing. Each topic includes practical starting points that can be adjusted to match your coffee, equipment, and personal taste.
Home Barista Hub: Where Should You Start?
A home barista is someone who prepares coffee at home using brewing techniques and equipment commonly associated with cafés.
The term often describes espresso enthusiasts, but the skills extend beyond espresso machines.
A person who makes carefully measured pour-over coffee, adjusts a grinder for a French press, or prepares cold brew can also develop strong home barista skills.
The starting point should be the kind of coffee you actually enjoy drinking.
| Your Main Goal | Best Starting Point | Main Skill to Develop |
| Better everyday black coffee | Drip coffee maker | Coffee-to-water ratio |
| Fresh manual filter coffee | Pour-over dripper | Grind size and pouring |
| Full-bodied coffee | French press | Immersion brewing |
| Strong stovetop coffee | Moka pot | Heat and grind control |
| Espresso shots | Espresso machine | Extraction and dialing in |
| Lattes and cappuccinos | Espresso machine with steam wand | Espresso and milk texture |
| Quick individual servings | Pod or automatic machine | Drink settings and maintenance |
| Cold coffee drinks | Cold brew or iced filter setup | Dilution and concentration |
For beginners, I recommend selecting one primary brewing method and preparing the same coffee several times before buying additional equipment.
This creates a useful reference for identifying flavor changes.
A well-prepared pour-over is not inferior to espresso. These drinks use different brewing methods and are intended to produce different flavor experiences.
The better starting point is the one that fits your normal morning routine.
Choose Your Home Coffee Brewing Method
Different brewing methods produce different levels of concentration, body, texture, and clarity.
Understanding these differences makes equipment selection much simpler.
Automatic Drip Coffee Makers
An automatic drip coffee maker heats water and distributes it over coffee grounds inside a filter basket.
The brewed coffee collects in a carafe or directly in a cup.
Drip machines are practical for households that prepare several servings together.
Some models offer programmable timers, brew-strength settings, and insulated thermal carafes.
A quality drip machine should maintain a suitable brewing temperature and distribute water evenly across the grounds.
The Specialty Coffee Association maintains a Certified Home Brewer program that evaluates qualifying machines for brewing temperature, time, and other performance characteristics.
Best for: Everyday black coffee, shared morning brewing, and households that prefer automatic preparation.
Pour-Over Coffee
Pour-over brewing involves manually pouring heated water over coffee grounds held in a filter.
Common devices include the Hario V60, Kalita Wave, and Chemex.
The shape of the brewer, filter material, grind size, and pouring technique influence extraction.
Paper filters generally produce a cleaner cup with less suspended sediment.
Pour-over coffee can highlight floral, fruity, and citrus characteristics, making it a good match for many light- and medium-roasted coffees.
A gooseneck kettle provides better pouring control, although some flat-bottom drippers are forgiving enough to use with an ordinary kettle.
Best for: Single-origin coffee, manual brewing, and people who enjoy adjusting their recipe.
French Press Coffee
A French press uses immersion brewing.
Coarsely or medium-coarsely ground coffee remains in contact with hot water before a metal mesh plunger separates much of the grounds from the drink.
Because the mesh filter allows more oils and fine particles into the cup than typical paper filters, French press coffee often has a fuller body.
The method requires relatively little equipment.
A French press, grinder, kettle, and scale are enough to begin.
Best for: Full-bodied coffee, simple manual preparation, and people who prefer a richer mouthfeel.
AeroPress Coffee
The AeroPress is a compact manual brewer that combines immersion with gentle pressure during filtration.
It can prepare a concentrated cup or a lighter filter-style coffee.
The device is portable, relatively easy to clean, and versatile.
Paper and compatible metal filters create different cup textures.
Brewing recipes vary considerably, so the manufacturer’s recommended method is a useful starting point before trying other approaches.
Best for: Small kitchens, travel, single servings, and experimenting with brewing recipes.
Moka Pot Coffee
A moka pot prepares concentrated coffee using steam pressure to move hot water from a lower chamber through coffee grounds into an upper chamber.
The resulting coffee is stronger than ordinary drip coffee but is not identical to traditional pump-driven espresso.
Moka pots are popular for milk-based drinks and strong black coffee.
They require attention to grind size, water level, assembly, and stove heat.
Best for: Concentrated stovetop coffee without purchasing a pump espresso machine.
Espresso Machines
An espresso machine forces heated water through a compact bed of finely ground coffee under pressure.
The process produces a small, concentrated beverage with a distinctive texture and, in many cases, crema.
Espresso requires more precise grind control than most filter brewing methods.
The equipment also needs regular cleaning and, depending on the design, periodic maintenance of seals, baskets, and internal water pathways.
Best for: Espresso, Americanos, cappuccinos, flat whites, lattes, and other café-style drinks.
Cold Brew Coffee
Cold brew is prepared by steeping ground coffee in cool water for an extended period.
The process generally produces a smooth, concentrated or ready-to-drink beverage, depending on the coffee-to-water ratio.
Cold brew is different from iced coffee, which is usually brewed hot and then chilled.
Best for: Preparing cold coffee ahead of time, batch brewing, and drinks served over ice.
Key Takeaway: Choose your brewer according to your favorite drink and the effort you want to put into preparation. Filter methods require less specialized equipment, while espresso demands more precise grinding and machine control.
Essential Home Barista Equipment
A complete coffee station does not require every accessory sold online.
Several tools contribute directly to coffee quality. Others mainly improve convenience, appearance, or cleanup.
1. Coffee Brewer or Espresso Machine
Your primary brewer determines the equipment you need next.
For filter coffee, choose a drip machine, French press, pour-over dripper, AeroPress, or another suitable method.
For espresso, compare manual, semi-automatic, automatic, and superautomatic machines.
A semi-automatic espresso machine gives you control over grinding, puck preparation, and extraction.
A superautomatic machine handles more of the process, commonly including grinding and brewing.
Capsule machines simplify preparation but limit your choices to compatible pods.
Before purchasing an espresso machine, check:
- Portafilter and basket compatibility
- Heating and warm-up behavior
- Steam wand or milk system
- Water reservoir access
- Cleaning and descaling instructions
- Availability of replacement parts
- Countertop dimensions
A machine with a long list of settings is not automatically better for someone who only prepares one cappuccino every morning.
2. Coffee Grinder
A burr grinder is one of the most useful tools for improving home-brewed coffee.
Burr grinders crush beans between grinding surfaces to produce particles within an adjustable size range.
Blade grinders chop beans using spinning blades, often creating a less controlled mixture of particle sizes.
Uneven particle sizes can contribute to uneven extraction.
For filter brewing, choose a grinder with suitable adjustment across medium and coarse settings.
For espresso, choose a grinder specifically capable of fine adjustments within the espresso range.
Two common burr designs are:
Conical burrs: Cone-shaped grinding surfaces commonly found in manual and electric home grinders.
Flat burrs: Flat grinding discs used in many espresso and specialty coffee grinders.
Burr geometry influences particle distribution, but grind quality also depends on alignment, motor design, adjustment mechanism, and the specific burr set.
I would prioritize consistent grinding and suitable adjustment over choosing a grinder solely by burr shape.
3. Digital Coffee Scale
A digital scale removes guesswork from coffee preparation.
Measuring coffee and water by weight makes recipes easier to reproduce.
For espresso, a scale that reads in 0.1-gram increments is useful because small changes in dose and beverage yield matter.
For larger filter brews, a regular digital kitchen scale may be sufficient.
A built-in timer is convenient but not mandatory.
A smartphone timer can serve the same purpose.
4. Kettle and Water Equipment
A kettle is necessary for most manual brewing methods.
A temperature-controlled kettle is useful for selecting water temperature without repeated guessing.
A gooseneck kettle provides controlled pouring for methods such as the V60.
For French press brewing, a standard kettle usually works well.
Use potable water suitable for your brewer.
Filtered water may improve flavor and reduce mineral problems, depending on the original water supply.
5. Espresso-Specific Accessories
Espresso preparation requires a few tools beyond the machine and grinder.
A tamper compresses ground coffee into a level bed inside the filter basket.
A portafilter holds the basket and attaches to the espresso machine’s group head.
A milk pitcher is used for steaming milk.
A knock box provides a place to discard spent coffee pucks.
A WDT tool, short for Weiss Distribution Technique, uses thin needles to break up clumps and distribute ground coffee before tamping.
WDT tools, bottomless portafilters, puck screens, and precision baskets can be useful, but most are not necessary for a first setup.
Start with the tamper and accessories supplied with your machine when they are suitable.
6. Coffee Storage and Cleaning Supplies
Store whole coffee beans in airtight packaging away from heat, sunlight, and moisture.
Useful maintenance supplies include a grinder brush, clean cloths, suitable coffee-machine detergent, and manufacturer-approved descaling products.
Cleaning supplies should be selected for the actual equipment.
An espresso cleaning tablet does a different job from a descaling product, and neither should be substituted blindly for the other.
Key Takeaway: A brewer, suitable burr grinder, scale, fresh coffee, and good water form the foundation of a home coffee setup. Espresso requires additional tools, but specialty accessories can come later.
How to Build a Home Coffee Station
A home coffee station should make the brewing process comfortable without taking over the kitchen.
The most practical arrangement follows the order in which coffee is prepared.
Choose the Best Countertop Location
Select a stable, level surface close to an appropriate electrical outlet if you use powered equipment.
Measure the space before buying a machine.
Include clearance for filling the water tank, opening a grinder hopper, removing the drip tray, and handling the portafilter.
Avoid placing electrical equipment where splashing water from a sink is likely.
Check the machine’s electrical requirements and manufacturer guidance. High-power appliances should not be connected through unsuitable extension cords or overloaded power strips.
Hot surfaces and steam wands also need adequate clearance.
Arrange Your Equipment in Brewing Order
A simple workflow starts with coffee storage, moves to grinding and weighing, then continues to brewing and serving.
For espresso, a practical arrangement is:
- Beans and grinder
- Scale and dosing area
- Tamper and puck preparation space
- Espresso machine
- Milk pitcher and serving cups
- Cleaning cloths and waste container
The exact direction is less important than keeping frequently used tools within easy reach.
A tamping mat can protect the countertop and provide a stable preparation surface.
Avoid placing loose tools directly against hot machine surfaces.
Plan a Realistic Equipment Budget
The cost of a home setup varies considerably.
A manual filter station may need only a grinder, dripper, scale, filters, and kettle.
An espresso station also needs a suitable machine, accessories, and more frequent maintenance.
Instead of spending the full budget on the machine, reserve money for a grinder and the remaining basic tools.
For a filter setup, the grinder and brewing device deserve priority.
For a manual espresso setup, the grinder and espresso machine need to be treated as a matched pair.
The grinder must provide sufficiently fine adjustments for the basket and pressure system.
I recommend leaving room in the budget for fresh coffee and maintenance products rather than spending everything on accessories.
Keep the Setup Simple at First
An organized coffee station does not need decorative shelves, illuminated signs, or expensive storage racks.
Start with the equipment used every day.
Add a small tray for filters, a container for beans, and a designated cleaning area if necessary.
A compact station is often easier to clean and maintain than a crowded arrangement.
Key Takeaway: Choose a stable countertop with enough clearance, organize tools in brewing order, and prioritize the grinder and brewer before decorative accessories.
How to Choose Coffee Beans for Home Brewing
The beans influence flavor before the brewing process begins.
A capable machine cannot restore aromas already lost through poor storage or turn unsuitable coffee into the flavor profile you wanted.
Understand Coffee Roast Levels
Roast level influences aroma, acidity, body, and the flavors produced during roasting.
Light roast coffees often preserve more of the characteristics associated with their origin, including floral, citrus, and fruit-like notes.
Medium roast coffees commonly offer a balance of sweetness, acidity, and developed roast flavors.
Dark roast coffees generally emphasize deeper roasted characteristics such as dark chocolate, toast, and smoky notes.
These descriptions are broad patterns rather than guarantees.
Bean variety, processing, and roasting decisions also change the final flavor.
For someone beginning with espresso, a medium roast may provide a familiar starting profile.
For pour-over, a light or medium roast can be appealing when you want to explore differences between origins.
Arabica vs Robusta
Arabica (Coffea arabica) is commonly associated with a broad spectrum of floral, fruity, nutty, and sweet flavors.
Robusta (Coffea canephora) generally contains more caffeine and can produce a heavier body with more pronounced earthy, woody, or bitter characteristics, depending on its quality and processing.
Robusta is used in some traditional espresso blends because it can contribute body and crema.
High-quality examples of both species exist.
Choose beans based on flavor preference rather than assuming a species name guarantees quality.
Single-Origin Coffee vs Blends
Single-origin coffee identifies beans sourced from a particular geographic origin, farm, cooperative, or production area.
Blends combine coffees from multiple lots or origins.
Single-origin offerings can highlight distinct flavor characteristics.
Blends may be designed for consistency, balance, or a specific espresso profile.
Neither category is automatically superior.
A medium-roasted blend may be easier to use as a consistent starting point for milk drinks.
A rotating single-origin coffee may be more interesting for flavor-focused pour-over brewing.
Coffee Freshness and Storage
Look for a roast date when buying freshly roasted coffee.
Roasted beans gradually lose aroma through gas release, oxidation, and other changes.
Store whole beans in airtight packaging in a cool, dry, dark location.
Avoid leaving them beside a stove or in a grinder hopper for extended periods.
Purchase quantities you expect to use while the coffee still tastes fresh.
Freezing sealed portions is an option for surplus beans.
Grind shortly before brewing whenever practical.
Key Takeaway: Choose coffee according to the flavors and drinks you enjoy. Fresh beans, suitable roast selection, and airtight storage matter more than assuming one origin or roast is best for everyone.
The Six Variables That Control Coffee Flavor
Every brewing method involves extracting soluble compounds from roasted coffee using water.
The balance of those compounds determines much of the drink’s flavor.
Six variables are especially useful for diagnosing poor coffee.
1. Coffee-to-Water Ratio
The brew ratio compares the weight of ground coffee with the water used for brewing.
For example, a ratio of 1:16 means using one gram of coffee for every 16 grams of water.
A practical filter-coffee recipe might use:
- 20 grams of coffee
- 320 grams of water
- Coffee-to-water ratio of 1:16
The Specialty Coffee Association’s traditional filter-brewing reference uses approximately 55 grams of coffee per liter of water, equivalent to about 1:18.2.
Many home filter recipes begin in the 1:15 to 1:18 range.
The best ratio varies with coffee, method, grind size, and taste.
For espresso, the ratio usually compares dry coffee dose with the weight of espresso collected in the cup.
An 18-gram dose producing 36 grams of espresso has a 1:2 beverage ratio.
2. Grind Size
Grind size influences the surface area exposed to water and the speed at which water moves through the coffee.
Finer grounds generally offer more surface area and can slow the flow through a coffee bed.
Coarser grounds generally offer less surface area and often permit faster flow.
Different brewing methods need different starting grinds.
| Brewing Method | General Starting Grind |
| Espresso | Fine |
| Moka pot | Medium-fine to fine, not automatically espresso-fine |
| Pour-over | Medium-fine to medium |
| Automatic drip | Medium |
| AeroPress | Fine to medium, depending on recipe |
| French press | Medium-coarse to coarse |
| Cold brew | Medium-coarse to coarse |
These are descriptive starting points, not universal grinder settings.
Grinder dial numbers differ across brands and models.
Taste and brewing behavior should determine later adjustments.
3. Water Temperature
Water temperature changes how quickly coffee compounds dissolve.
For many hot filter brewing methods, approximately 195–205°F (90–96°C) provides a useful starting range.
The Specialty Coffee Association’s home-brewer certification requirements evaluate water temperatures near the coffee bed within a defined range.
An individual coffee may taste better with a different temperature.
Lighter roasts may benefit from hotter brewing water, while some darker roasts taste more balanced at lower temperatures.
Espresso machine water temperatures also vary by design and recipe.
Do not assume that hotter water always produces better coffee.
4. Brewing Time
Time determines how long water remains in contact with the coffee grounds.
French press brewing may involve several minutes of immersion.
Pour-over brewing depends on the dripper, grind size, water volume, and pouring technique.
Espresso extraction occurs over a much shorter period because pressurized water moves through finely ground coffee.
Brewing time should be interpreted alongside taste and other variables.
A slower brew is not automatically better.
5. Water Quality
Coffee is made mostly of water.
Its mineral composition can change extraction and flavor.
Extremely hard water may contribute to limescale buildup in machines.
Very low-mineral water can also behave differently during extraction and may be unsuitable for certain espresso machines.
Use potable water that meets the equipment manufacturer’s requirements.
A suitable filter may be useful when local water contains excessive hardness or noticeable chlorine flavors.
Do not assume every reverse-osmosis or distilled-water source is approved for every coffee machine.
6. Agitation and Filtration
Agitation refers to the movement of water and coffee particles during brewing.
Pouring, stirring, and swirling can change how evenly grounds contact the water.
Excessive agitation may increase extraction or contribute to fines moving into the filter.
Filter material also affects the cup.
Paper filters generally trap more oils and sediment.
Metal filters allow more fine particles and oils to pass into the beverage.
The result can be a fuller mouthfeel.
Key Takeaway: Ratio, grind, temperature, time, water composition, and agitation shape coffee flavor. Change one main variable at a time so you can identify which adjustment improves the cup.
Basic Coffee Brewing Recipes for Home Baristas
The following recipes provide starting points for common home brewing methods.
They are not fixed rules. Coffee origin, roast level, equipment, and personal preference may call for adjustments.
Pour-Over Coffee Recipe
Ingredients and equipment:
- 18 grams of medium-fine ground coffee
- 300 grams of water
- Pour-over dripper and suitable filter
- Kettle, scale, and timer
Method:
- Heat the brewing water to approximately 200°F.
- Place the paper filter inside the dripper and rinse it with hot water.
- Discard the rinse water.
- Add 18 grams of freshly ground coffee.
- Pour about 40 grams of water to wet the grounds.
- Allow the coffee to bloom for approximately 30–45 seconds.
- Continue adding water in controlled pours until the scale reaches 300 grams.
- Allow the water to pass through the grounds.
A total brewing time around 2½–4 minutes is a reasonable starting window for many small pour-over recipes.
Taste the coffee before changing the grind.
If it tastes sharply sour or thin, try a somewhat finer grind.
If it tastes harsh or drying, try a slightly coarser grind.
French Press Coffee Recipe
Ingredients:
- 30 grams of medium-coarse coffee
- 500 grams of hot water
- French press
Method:
- Heat water to approximately 200°F.
- Add the ground coffee to the French press.
- Pour in 500 grams of water, making sure the grounds become wet.
- Stir gently if needed.
- Place the lid on the press.
- Allow the coffee to steep for approximately four minutes.
- Press the plunger slowly and carefully.
- Pour the brewed coffee into cups or a separate container.
Avoid forcing the plunger if it encounters strong resistance.
Leaving brewed coffee in prolonged contact with the grounds can change its flavor.
Automatic Drip Coffee Recipe
For a simple batch recipe, start with approximately 60 grams of coffee per liter of water.
This produces a ratio of about 1:16.7.
Use a medium grind as a starting point.
Place the filter and coffee into the basket, fill the water reservoir, and begin brewing according to the machine instructions.
If the result is too strong, adjust the coffee dose slightly.
If the flavor is weak or underdeveloped, inspect the grind, brew temperature, and dose before purchasing a new machine.
AeroPress Coffee Recipe
Start with 15 grams of ground coffee and 240 grams of hot water.
Use a grind suitable for the AeroPress recipe and filter being used.
Prepare the brewer according to the manufacturer’s instructions.
Add the coffee and water, stir gently, and allow a short immersion period.
Press slowly and steadily into a sturdy cup.
A brewing time around one to two minutes after adding water can work as a starting point, but AeroPress recipes vary.
Avoid forcing the plunger or pressing into an unstable container.
Moka Pot Coffee Recipe
Moka pot quantities depend on the size of the device.
Fill the lower chamber with water according to the manufacturer’s instructions, keeping the level below the safety valve where specified.
Fill the filter basket with suitable ground coffee.
Level the coffee without tamping it.
Assemble the pot securely and place it over low to medium heat.
Remove it from the heat when the brew is nearly complete and begins sputtering, adjusting according to the model and stove.
Never block the safety valve or open a hot, pressurized moka pot.
Cold Brew Coffee Recipe
For a ready-to-drink starting recipe, use:
- 80 grams of medium-coarse coffee
- 1 liter of cool potable water
Combine the coffee and water in a clean container.
Stir gently to wet all the grounds.
Cover and refrigerate for approximately 12–18 hours.
Filter the coffee thoroughly and keep the finished beverage refrigerated.
Adjust the coffee dose, steeping period, or dilution to suit your preferred strength.
Cold brew concentrate uses a higher coffee-to-water ratio and usually needs dilution before drinking.
Key Takeaway: Start with measured recipes rather than guessing by spoonful. Repeat a recipe, taste the result, and make small adjustments before changing the coffee or brewing device.
How to Make Espresso at Home
Espresso requires greater control over grind size, dose, and beverage yield than most filter brewing methods.
The goal is to create a balanced shot that can be repeated with the same coffee and equipment.
Prepare the Machine and Coffee
Begin with a clean machine and a suitable espresso grinder.
Allow the machine to reach its recommended brewing temperature.
Follow the manufacturer’s warm-up or flushing instructions.
Select a basket and check its recommended dose range.
For a double basket designed to hold 18 grams, use 18 grams as an initial dose.
Dry the basket before filling it.
Moisture inside the basket can cause ground coffee to clump and affect preparation.
Grind, Distribute, and Tamp
Grind the measured coffee directly into the portafilter or a dosing cup.
Distribute the grounds across the basket.
A gentle tapping method or WDT tool can reduce visible clumps.
Level the coffee bed before tamping.
Press the tamper straight down to form a level, compact puck.
Consistency matters more than attempting to apply an exaggerated amount of force.
A slanted puck can contribute to uneven water flow.
Pull a Measured Espresso Shot
A common starting recipe for a double espresso is:
| Variable | Starting Target |
| Coffee dose | 18 grams |
| Espresso yield | 36 grams |
| Beverage ratio | 1:2 |
| Approximate shot time | 25–35 seconds |
| Grind | Fine, adjusted to flow and taste |
These values are starting points rather than requirements.
The correct dose depends on your basket, and extraction time depends on the machine and how timing is measured.
Start brewing with a cup on a scale.
Stop the extraction when the desired beverage weight is reached.
Taste the espresso before judging its quality from the shot time or appearance.
Dial In Espresso by Taste
Dialing in means adjusting the coffee recipe until the espresso tastes balanced.
If the shot runs too quickly and tastes thin or sharply sour, a finer grind may improve extraction.
If it runs very slowly and tastes harsh or overly bitter, a coarser grind may help.
Not every sour note means under-extraction. Some coffees naturally contain bright acidity.
Similarly, darker roasts may have stronger bitter flavors even when extracted correctly.
Keep the dose constant while adjusting the grind.
After the flow is reasonably controlled, experiment with beverage yield.
A shorter yield can produce a more concentrated drink.
A longer yield can change extraction and dilute the beverage.
The best final recipe is the one that tastes good with your specific coffee.
Pressurized vs Non-Pressurized Baskets
A pressurized basket, sometimes called a dual-wall basket, creates additional resistance through a restricted outlet.
It can make espresso preparation more forgiving when using preground coffee or a less precise grinder.
A non-pressurized basket, also called a single-wall basket, relies more directly on the resistance created by the ground coffee.
This design gives greater control but demands an espresso-capable grinder.
Beginners using pressurized baskets should follow their machine’s recipe guidance rather than automatically copying recipes developed for non-pressurized baskets.
Understand Channeling
Channeling occurs when water flows unevenly through the coffee puck.
Some areas receive more water than others, contributing to uneven extraction.
Possible signs include spraying from a bottomless portafilter, inconsistent shot flow, and mixed sour and bitter flavors.
Common contributors include uneven distribution, clumps, puck damage, and inappropriate grind settings.
Use consistent preparation before changing accessories.
Key Takeaway: Start with the dose your basket supports, measure espresso yield, and adjust grind by flow and taste. An 18-gram dose and 36-gram yield provide a useful reference for many double espresso setups.
How to Steam Milk for Lattes and Cappuccinos
Milk steaming combines heating and aeration.
The goal is to create a smooth texture that blends naturally with espresso rather than a thick layer of disconnected bubbles.
Understand Microfoam
Microfoam is milk foam made up of very small, closely distributed bubbles.
It has a glossy, silky appearance.
The texture is useful for lattes, cappuccinos, flat whites, and latte art.
Large bubbles create a rougher, less integrated foam.
A steam wand provides control over how air enters the milk and how the milk circulates.
A standalone electric frother may create appealing foam, but its texture can differ from steam-wand microfoam.
Step-by-Step Milk Steaming
Start with cold milk in a clean stainless steel pitcher.
- Fill the pitcher to an appropriate level, leaving room for expansion.
- Purge the steam wand briefly according to the machine instructions.
- Place the steam tip just below the milk surface near one side of the pitcher.
- Activate the steam and introduce a small amount of air near the beginning.
- Position the wand to create a circulating whirlpool.
- Continue heating while maintaining smooth circulation.
- Stop steaming when the milk reaches the desired temperature.
Breville commonly recommends a temperature around 140–150°F (60–65°C) for dairy milk used in espresso drinks.
Different milk types and personal preferences may call for lower temperatures.
Use a thermometer when beginning rather than relying solely on the feel of the pitcher.
Turn the steam off before removing the wand from the milk.
Wipe and purge the wand immediately afterward, taking care around hot metal and steam.
Choosing Dairy and Plant-Based Milk
Dairy milk can produce smooth microfoam because its proteins support foam formation.
Whole milk often gives a creamy mouthfeel.
Lower-fat milk may create a lighter texture.
Plant-based products behave differently.
Barista-formulated oat and soy milks are often designed to maintain better texture when heated.
Almond milk may be less stable under some conditions.
Start with the temperature instructions recommended by the milk producer or equipment manufacturer.
For some plant-based milks, lower temperatures reduce separation or curdling.
Keep milk refrigerated before use and discard milk that has been left at unsafe temperatures.
Basic Latte Art Technique
Latte art begins with the texture of the milk.
Prepare a smooth espresso and freshly steamed milk.
Swirl the milk pitcher to keep the foam integrated.
Begin pouring from slightly higher above the cup to mix the milk with espresso.
As the cup fills, lower the pitcher closer to the surface and adjust the pour to produce a simple pattern.
A heart is a sensible first design.
Concentrate on smooth milk texture and controlled pouring before attempting complex rosettas.
Key Takeaway: Good steamed milk requires controlled aeration, continuous circulation, and suitable temperature. Smooth microfoam matters more than producing a large volume of foam.
Popular Café Drinks You Can Make at Home
Once you can prepare espresso and texture milk, many familiar café drinks become straightforward.
The main differences involve espresso concentration, added water, milk quantity, and foam texture.
| Drink | Main Ingredients | Typical Character |
| Espresso | Concentrated brewed coffee | Strong, short serving |
| Americano | Espresso and hot water | Longer black coffee |
| Cappuccino | Espresso, steamed milk, foam | Noticeable foam and coffee flavor |
| Latte | Espresso and more steamed milk | Creamy, mild coffee flavor |
| Flat white | Espresso and finely textured milk | Coffee-forward with thin microfoam |
| Macchiato | Espresso with a small amount of milk foam | Strong espresso character |
| Mocha | Espresso, chocolate, milk | Chocolate-flavored coffee |
| Iced latte | Espresso, cold milk, ice | Chilled milk-based coffee |
| Affogato | Espresso over ice cream or gelato | Coffee dessert |
Recipes vary by café, country, and serving size.
The following starting methods work for many home setups.
Espresso and Americano
Prepare a double espresso using a suitable basket and recipe.
For an Americano, add hot water to the espresso according to your preferred strength.
A starting combination is one double espresso with approximately 90–150 grams of hot water.
Adjust the water amount after tasting.
Latte and Cappuccino
For a latte, prepare espresso and add a larger quantity of steamed milk with a relatively thin layer of microfoam.
For a cappuccino, use a smaller serving or more pronounced foam texture, depending on your preferred style.
The exact ratios are not universal.
Start with a consistent espresso dose and change the milk quantity to identify the balance you prefer.
Flat White and Macchiato
A flat white generally emphasizes espresso with finely textured milk and a thin foam layer.
A traditional espresso macchiato is a small espresso marked with a modest amount of milk or foam.
These drinks are useful for tasting how small changes in milk quantity affect the espresso.
Mocha and Iced Latte
For a mocha, dissolve a suitable chocolate ingredient in espresso before adding steamed milk.
For an iced latte, combine espresso with cold milk and ice.
A common home approach is to prepare the espresso separately, then pour it into a glass containing milk and ice.
Adjust sweetness and milk quantity according to taste.
Key Takeaway: Many café drinks share the same espresso base. Once you can prepare a balanced shot and texture milk, drink variety comes mainly from milk quantity, water, chocolate, and serving temperature.
How to Taste Coffee and Troubleshoot Problems
Taste provides more useful information than appearance alone.
Brewing time, crema, and coffee color are useful clues, but they do not independently prove that a drink has been extracted correctly.
Common Coffee Problems and Likely Causes
| Problem | Possible Cause | First Adjustment |
| Sour and thin filter coffee | Low extraction or a highly acidic coffee | Try a finer grind |
| Bitter and harsh filter coffee | Excess extraction or dark roast character | Try a coarser grind |
| Weak coffee | Low coffee dose or excess water | Adjust the brew ratio |
| Espresso runs too fast | Grind too coarse, low dose, or channeling | Check dose and grind finer |
| Espresso runs too slowly | Grind too fine or excessive resistance | Grind coarser |
| Espresso sprays unevenly | Uneven puck preparation | Improve distribution and tamp level |
| Coffee tastes stale | Old beans or poor storage | Use fresher coffee |
| Coffee tastes unusually flat | Water quality or extraction problem | Check water and recipe |
| Milk has large bubbles | Excessive early aeration | Introduce less air and improve circulation |
| Machine flow is weak | Blockage, scale, or incorrect preparation | Follow the model’s diagnostic procedure |
These are starting checks, not guaranteed diagnoses.
Change One Variable at a Time
If you change grind size, dose, water temperature, and brewing time together, it becomes difficult to identify which adjustment caused the flavor change.
A more controlled method is to keep most variables constant.
For example, when adjusting espresso, keep the coffee dose and beverage yield the same while changing grind size.
For pour-over, keep the coffee dose, water quantity, and pouring method consistent while adjusting the grind.
Taste each result and record the change.
This approach reduces wasted coffee and makes future recipes easier to reproduce.
Use a Simple Coffee Tasting Record
A short tasting log can be more useful than complicated coffee scoring systems.
Record:
- Coffee name and roast date
- Brewing method
- Grinder setting
- Coffee dose and water or beverage yield
- Brewing time
- Flavor notes
- Next adjustment
You might describe one cup as bright and sweet, another as bitter and drying, and a third as balanced with a pleasant finish.
The descriptions do not need to sound professional.
The purpose is to identify what tastes good to you and how to repeat it.
Key Takeaway: Diagnose poor coffee using taste, brewing behavior, and measured recipes together. Adjust one major variable at a time and keep a simple record of the results.
Cleaning and Maintaining Your Home Coffee Equipment
Clean equipment protects beverage flavor and reduces the likelihood of blockages, unpleasant residue, and avoidable machine problems.
Different equipment requires different cleaning procedures.
Daily Cleaning
After brewing, discard used coffee grounds and rinse removable brewing components.
Wash carafes, French presses, and compatible filters according to their manufacturer instructions.
For espresso machines, remove spent pucks and clean the portafilter and basket.
Follow the machine’s procedure for flushing the group head.
Wipe the steam wand immediately after milk preparation and purge it as directed.
Milk residue should not remain on hot equipment.
Clean the drip tray before it becomes full or develops odor.
Grinder Cleaning
Coffee oils and fine particles can accumulate inside grinders.
Brush away accessible residue according to the manufacturer’s instructions.
Some grinders permit removal of the upper burr for cleaning.
Unplug the grinder before accessing internal components.
Do not place water inside an electric grinder unless the manufacturer expressly permits washing a removable part.
Use grinder cleaning products only when approved for the model.
A clean grinder reduces the buildup of stale coffee residue that can affect flavor.
Backflushing Espresso Machines
Some espresso machines support backflushing, a cleaning process that uses a blind filter basket or cleaning disc to flush the group head and internal valve pathway.
Not every machine supports this procedure.
Backflushing may involve water alone or a manufacturer-approved cleaning detergent.
Follow the exact procedure and frequency in the machine manual.
Using a blind basket on an incompatible machine can create problems.
Do not assume a cleaning process described for a commercial espresso machine is suitable for every home model.
Descaling and Water Maintenance
Descaling removes mineral deposits from internal water pathways.
The amount of buildup depends on water hardness, brewing frequency, and equipment design.
Some machines have automatic descaling reminders.
Others specify maintenance intervals or water testing requirements.
Use the manufacturer’s approved descaling product and procedure.
Do not substitute vinegar automatically, since some manufacturers advise against it.
Avoid using water treatments that conflict with the machine’s materials or sensors.
Cleaning coffee oils and removing mineral scale are different maintenance tasks.
When to Replace Parts
Inspect gaskets, seals, filters, and other replaceable components.
A leaking portafilter may indicate a worn group gasket, incorrect basket installation, excessive coffee dose, or another issue.
Weak water flow may indicate scale, a blockage, or a pump-related problem.
Start with the checks described in the equipment manual.
Do not open electrical housings or attempt internal pressure-system repairs without appropriate qualifications.
Key Takeaway: Clean coffee-contact parts after use, maintain the grinder, and follow model-specific instructions for backflushing and descaling. Routine care protects flavor and reduces avoidable equipment problems.
A 14-Day Home Barista Practice Plan
Building repeatable coffee skills is easier when practice follows a clear order.
This two-week plan works as a starting framework for filter coffee or espresso.
| Days | Main Focus | Practice Task |
| 1–2 | Equipment and setup | Identify machine settings, grinder controls, and cleaning requirements |
| 3–4 | Coffee measurement | Repeat the same coffee-to-water or espresso ratio |
| 5–6 | Grind adjustment | Compare slightly finer and coarser grind settings |
| 7 | Taste comparison | Identify differences in acidity, bitterness, sweetness, and body |
| 8–9 | Brewing consistency | Repeat a recipe without changing multiple variables |
| 10–11 | Advanced preparation | Practice espresso puck preparation or controlled pour-over technique |
| 12 | Milk practice | Practice smooth milk texture if using an espresso machine |
| 13 | Troubleshooting | Diagnose one common brewing problem |
| 14 | Final repeat | Prepare your preferred drink using a recorded recipe |
Use the same coffee during the first several sessions when possible.
Switching between multiple beans can hide the effects of grind and ratio adjustments.
There is no need to consume every practice drink.
Prepare smaller doses when your brewing equipment supports them, and space out tastings to avoid excessive caffeine intake.
After two weeks, focus on the weakest part of the routine instead of immediately purchasing new gear.
Common Home Barista Mistakes to Avoid
Several mistakes appear repeatedly in beginner setups.
The first is buying an expensive espresso machine without reserving money for a suitable grinder.
A machine cannot compensate fully for a grinder that lacks fine adjustment.
Another mistake is measuring coffee by appearance rather than weight.
Using a scale creates repeatable starting recipes and makes troubleshooting easier.
Some beginners change several brewing variables simultaneously.
This makes it difficult to identify the cause of an improvement or failure.
A fourth mistake is assuming every coffee should taste the same.
A naturally bright Ethiopian coffee may taste very different from a chocolate-forward Brazilian blend, even when both are prepared carefully.
Another issue is neglecting water quality.
Mineral content can affect flavor and equipment maintenance.
Milk preparation introduces separate mistakes.
Adding too much air, overheating the milk, or failing to clean the steam wand can reduce drink quality and create hygiene problems.
Finally, many home brewers buy accessories before mastering the equipment they already own.
I would improve the grinder, brewing recipe, and cleaning routine before investing in decorative upgrades.
When Should You Upgrade Your Home Barista Equipment?
Equipment upgrades make sense when you can identify a limitation that prevents the result you want.
A new accessory should solve a specific problem rather than simply add another step to your routine.
Upgrade the Grinder When Adjustment Is Too Limited
If your espresso repeatedly switches between flowing too quickly and too slowly with no useful grinder setting between them, the grinder may lack suitable adjustment resolution.
An espresso-capable burr grinder may provide a meaningful improvement.
For filter coffee, upgrade when the grinder produces inconsistent grounds, cannot reach your preferred grind range, or creates workflow problems.
Upgrade the Brewer When Its Limits Are Clear
A basic drip brewer may struggle with temperature control or uneven water distribution.
An SCA-certified home brewer is worth considering when you want independently evaluated brewing performance.
For espresso, a machine upgrade may be justified by inadequate temperature stability, limited steam capacity, slow recovery between drinks, or repair concerns.
A new machine does not automatically solve problems caused by inconsistent puck preparation.
Add Accessories for Specific Tasks
A WDT tool may improve ground coffee distribution.
A better tamper may provide a more comfortable, level tamp.
A milk pitcher with an appropriate spout may improve pouring control.
A bottomless portafilter can expose some problems in espresso flow.
Each accessory should serve a purpose.
None guarantees better-tasting coffee without a suitable brewing recipe.
Develop Advanced Skills Before Spending More
Once basic brewing becomes consistent, explore:
- Comparing coffee origins and processing styles
- Adjusting espresso beverage ratios
- Understanding water hardness and alkalinity
- Comparing paper and metal filters
- Practicing milk texture and latte art
- Preparing multiple drinks with consistent timing
- Recording and comparing tasting results
These skills provide more direction for future equipment purchases.
Key Takeaway: Upgrade when your existing equipment has an identifiable limitation. Better grinding, repeatable recipes, and clean equipment often matter more than additional accessories.
Building a Home Barista Routine That Lasts
A good coffee routine should fit comfortably into daily life.
If preparing one drink requires too many unnecessary steps, the setup may become frustrating even when the coffee tastes good.
For a filter coffee routine, prepare the brewer, weigh the beans, grind, add water, and clean the equipment afterward.
For espresso, group the process into preparation, extraction, milk steaming when needed, and cleanup.
Keep the frequently used tools accessible.
Buy coffee in quantities that match your consumption.
Use a recorded recipe for your usual drink and experiment only when you want a different flavor.
Not every coffee session needs to involve experimentation.
A repeatable, enjoyable morning cup is a worthwhile result on its own.
Conclusion
The Home Barista Hub starts with a straightforward principle: better coffee comes from matching suitable equipment with fresh beans, measured recipes, and consistent preparation. You do not need an expensive espresso station to make excellent coffee at home.
Choose your preferred brewing method, invest in a grinder suited to that method, and develop control over coffee dose, water, grind size, temperature, and brewing time. Espresso adds the need for careful puck preparation, extraction control, and milk steaming, while filter brewing provides a simpler starting point.
My recommendation is to master one daily recipe before expanding into additional machines and techniques. Keep your equipment clean, pay attention to taste, and upgrade only when you understand what the new tool will improve. That approach creates a home coffee setup that remains enjoyable and practical.
FAQs About Home Barista Setups
What do I need to become a home barista?
Start with a coffee brewer, suitable grinder, fresh coffee beans, clean water, and a digital scale.
The specific equipment depends on your preferred brewing method.
Pour-over coffee requires a dripper, filter, and kettle, while espresso requires a suitable machine and an espresso-capable grinder.
Milk-based espresso drinks also need a steam wand or milk-frothing device.
The most useful starting skill is preparing a consistent recipe and adjusting it by taste.
Can I become a home barista without an espresso machine?
Yes. Home coffee preparation includes more than espresso.
You can develop strong brewing skills using a French press, pour-over dripper, AeroPress, moka pot, or automatic drip brewer.
These methods involve measuring ingredients, selecting grind size, controlling water temperature, and evaluating flavor.
A manual filter setup is often a less expensive way to begin exploring specialty coffee.
An espresso machine becomes necessary only if you want traditional espresso and drinks made from it.
How much money do I need for a home barista setup?
The cost varies with the brewing method and equipment quality.
A basic manual filter setup generally requires fewer expensive components than an espresso station.
For filter brewing, prioritize the grinder, brewing device, scale, and kettle.
For espresso, allocate enough of the budget to purchase both a suitable machine and an espresso-capable grinder.
Remember to account for beans, filters, cleaning supplies, maintenance, and replacement parts.
What is the best coffee machine for a beginner home barista?
The best starting machine depends on the kind of coffee you drink most often.
An automatic drip brewer is practical for ordinary black coffee and larger batches.
A compact semi-automatic espresso machine suits beginners who want to prepare espresso and milk drinks while controlling the brewing process.
A superautomatic machine is more appropriate when convenience is the main priority.
Compare grinder requirements, cleaning, drink capacity, and counter space before purchasing.
Is a coffee grinder more important than an espresso machine?
Both are necessary for a traditional espresso setup, but the grinder has a major influence on extraction.
Espresso requires fine grind adjustments to control how water passes through the coffee puck.
An expensive espresso machine paired with a grinder that cannot make suitable adjustments may produce inconsistent results.
A capable grinder paired with a more modest espresso machine can be a sensible setup.
The two pieces of equipment should be chosen together.
How long does it take to make good coffee at home?
Basic filter coffee can be prepared successfully from the first session when suitable ingredients and a clear recipe are used.
Espresso generally requires more practice because small changes in grind size, dose, and preparation affect the shot.
Milk steaming and latte art add further skills.
Rather than focusing on a fixed number of days, repeat the same recipe and record changes in flavor.
Consistency is a more useful measure of progress than time spent practicing.
What is the best coffee-to-water ratio for beginners?
For many filter brewing methods, a ratio around 1:16 is a useful starting point.
That means using 20 grams of coffee with 320 grams of water.
The Specialty Coffee Association’s traditional reference ratio is approximately 55 grams per liter, or about 1:18.2.
Espresso uses a different measurement convention. A common starting recipe is 18 grams of ground coffee producing 36 grams of espresso, giving a 1:2 beverage ratio.
Adjust either recipe by taste.
How can I make my home coffee taste like café coffee?
Begin with fresh coffee beans, an appropriate grind, measured ingredients, and suitable brewing water.
For espresso drinks, use a grinder capable of precise adjustment and prepare consistent coffee doses and beverage yields.
Practice milk steaming until the texture is smooth rather than filled with large bubbles.
Clean the machine and grinder regularly.
If the result tastes wrong, change one brewing variable at a time. A repeatable recipe is the strongest foundation for producing café-style coffee at home.